Introduction
In this guide, we’re going to walk you through how to set up a lightweight Kubernetes cluster using MicroK8s — a minimal, zero-configuration tool from Canonical. Whether you’re a developer experimenting on your local machine or a DevOps engineer looking for a fast, production-ready setup, MicroK8s is a great alternative to full-scale Kubernetes distributions.
It’s easy to install, runs on Linux, macOS, and Windows, and is perfect for testing, learning, or even running real workloads with minimal overhead. Let’s dive in and get your cluster up and running in just a few steps.
What is MicroK8s?
MicroK8s is a lightweight version of Kubernetes made for developers and DevOps engineers who want to run Kubernetes locally.
- Super fast and easy to install
- Great for testing and learning Kubernetes
- Comes with optional add-ons like DNS, Ingress, and Dashboard
- Works on Linux, Windows (WSL), and macOS
- Fully compatible with real Kubernetes
It’s a simple way to get a working Kubernetes cluster on your machine — without the complexity.
Prerequisites
Before installing MicroK8s, make sure you have the following:
- A system running Ubuntu 18.04+, Debian, or any Linux distro with snap support
- Sudo/root access on your machine
- At least 2 CPUs and 2 GB RAM.
- snap installed
Step 1 – Install MicroK8s
First make sure, snap is installed.After that with below command we can install microk8s on ubuntu.
sudo snap install microk8s --classic
Step 2 – Add Your User to MicroK8s Group
After installing microk8s , we have to add your user in microk8s group.We can check if its added or not by running below command.If its give error , we can add it by next commands.
microk8s status --wait-ready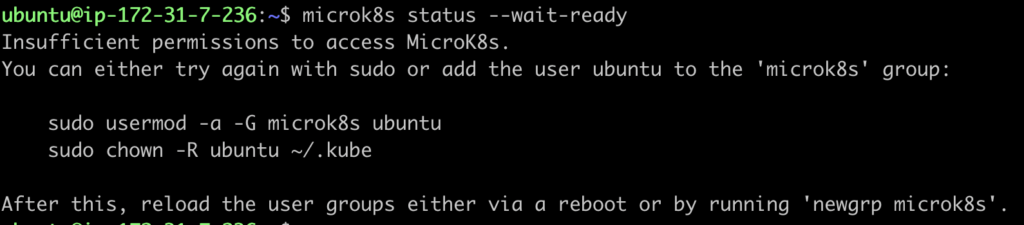
Insufficient permissions to access MicroK8s.Add current user in microk8s group.
sudo usermod -a -G microk8s $USER
newgrp microk8s
Step 3 – Check MicroK8s Status
After adding user in microk8s group , we can check microk8s running status with below command.If its in running state , then we are good for our deployment and testing.
microk8s status --wait-ready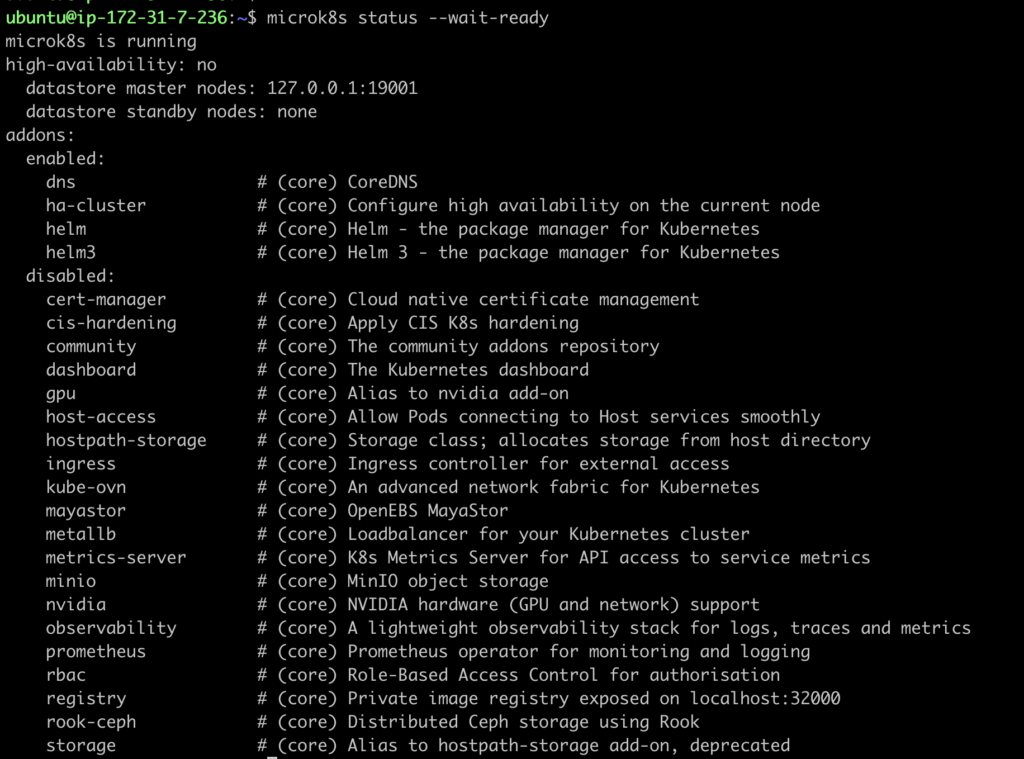
Step 4 – Enable Essential Add-ons
microk8s provides several essentials add-ons which are helpful in a kubernetes cluster.With the help of below command we can enable needed addons.
Like below we have enabled storage , metrics-service and dashboard addons.
microk8s enable storage metrics-server dashboard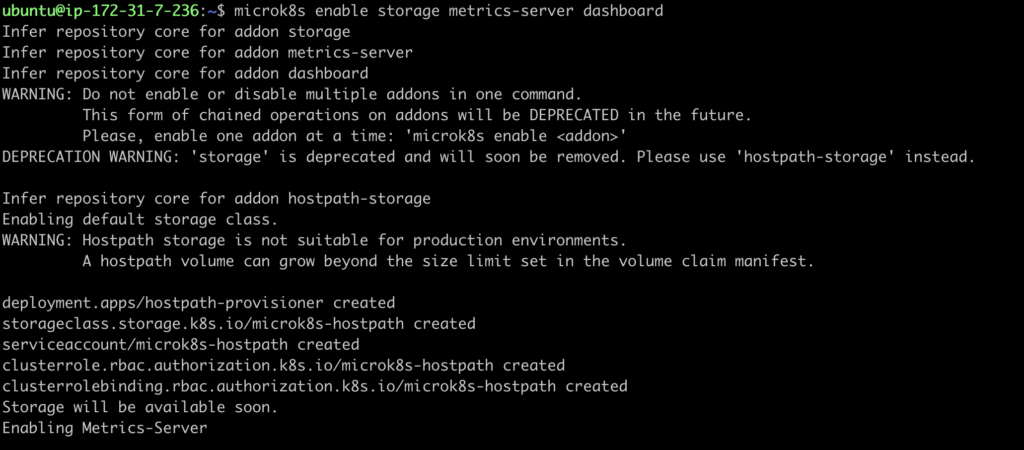
List of available addons in microk8s , which we can enable.
addons:
  enabled:
    dns                  # (core) CoreDNS
    ha-cluster           # (core) Configure high availability on the current node
    helm                 # (core) Helm - the package manager for Kubernetes
    helm3                # (core) Helm 3 - the package manager for Kubernetes
  disabled:
    cert-manager         # (core) Cloud native certificate management
    cis-hardening        # (core) Apply CIS K8s hardening
    community            # (core) The community addons repository
    dashboard            # (core) The Kubernetes dashboard
    gpu                  # (core) Alias to nvidia add-on
    host-access          # (core) Allow Pods connecting to Host services smoothly
    hostpath-storage     # (core) Storage class; allocates storage from host directory
    ingress              # (core) Ingress controller for external access
    kube-ovn             # (core) An advanced network fabric for Kubernetes
    mayastor             # (core) OpenEBS MayaStor
    metallb              # (core) Loadbalancer for your Kubernetes cluster
    metrics-server       # (core) K8s Metrics Server for API access to service metrics
    minio                # (core) MinIO object storage
    nvidia               # (core) NVIDIA hardware (GPU and network) support
    observability        # (core) A lightweight observability stack for logs, traces and metrics
    prometheus           # (core) Prometheus operator for monitoring and logging
    rbac                 # (core) Role-Based Access Control for authorisation
    registry             # (core) Private image registry exposed on localhost:32000
    rook-ceph            # (core) Distributed Ceph storage using Rook
    storage              # (core) Alias to hostpath-storage add-on, deprecated
Step 5 – Use kubectl with MicroK8s
To run kubectl commands in microk8s , we can use below command.
microk8s kubectl get nodes
Optional: Alias for Convenience
If you want to avoid typing microk8s kubectl every time, you can set an alias:
alias kubectl='microk8s kubectl'Add it to your ~/.bashrc or ~/.zshrc file to make it permanent:
echo "alias kubectl='microk8s kubectl'" >> ~/.bashrc
source ~/.bashrc
Step 6 – Deploy a Test App (NGINX)
Now as we have our local cluster ready with microk8s running , we can deploy a sample nginx deployment to test it.
kubectl create deployment nginx-deployment --image=nginx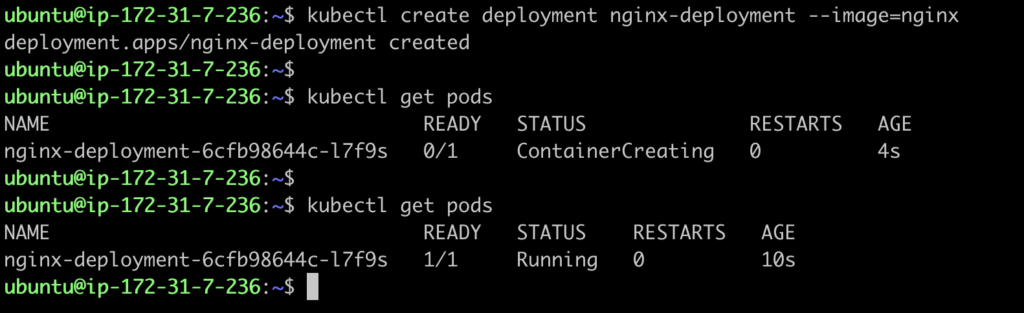
Common MicroK8s Commands
Below are the common microk8s command which we can use while running kubernetes cluster using microk8s
Start and Stop MicroK8s
sudo microk8s start     # Start MicroK8s
sudo microk8s stop      # Stop MicroK8s
Check MicroK8s Status
microk8s status --wait-readyEnable/Disable Add-ons
microk8s enable <addon>     # Enable an addon (e.g., dns, dashboard)
microk8s disable <addon>    # Disable an addon
Reset MicroK8s
microk8s reset # Wipe all data and reset the clusterConclusion
MicroK8s provides a super simple way to get up and running with Kubernetes locally. It’s a good tool for learning, testing, and even lightweight production use cases.
Hope you enjoyed the blog.